
Zombies Aren't Real Wiki › Boston
Zombies Aren't Real Boston guide
Across five levels, the Zombies Aren't Real Boston map grows from a few dockside streets to a harbor with several crossings. We cleared Normal with garrisons in the northern blocks, then a smaller zone covered by mortars. By the final level a gate between districts gave civilians a way out when an outer wall fell. Extra Safe Zones is Boston's campaign perk in Jogamedev's horde-defense strategy game.
Zombies Aren't Real Boston levels and unlocks
The Civilians column is the population set for the level; the end screen can show a different battle total. Boston level 2 is set to 25,746 civilians, and our run started with 25,768. We played Boston on Normal with Fixed difficulty.
Boston level 1: Put a gate on the south side of the northern blocks
- Badge
- Silver · 8%
- Civilians saved
- 669 / 8,142
- Game time
- 5:25
- Top kills
- Garrison 7,810 · Paratroopers 64
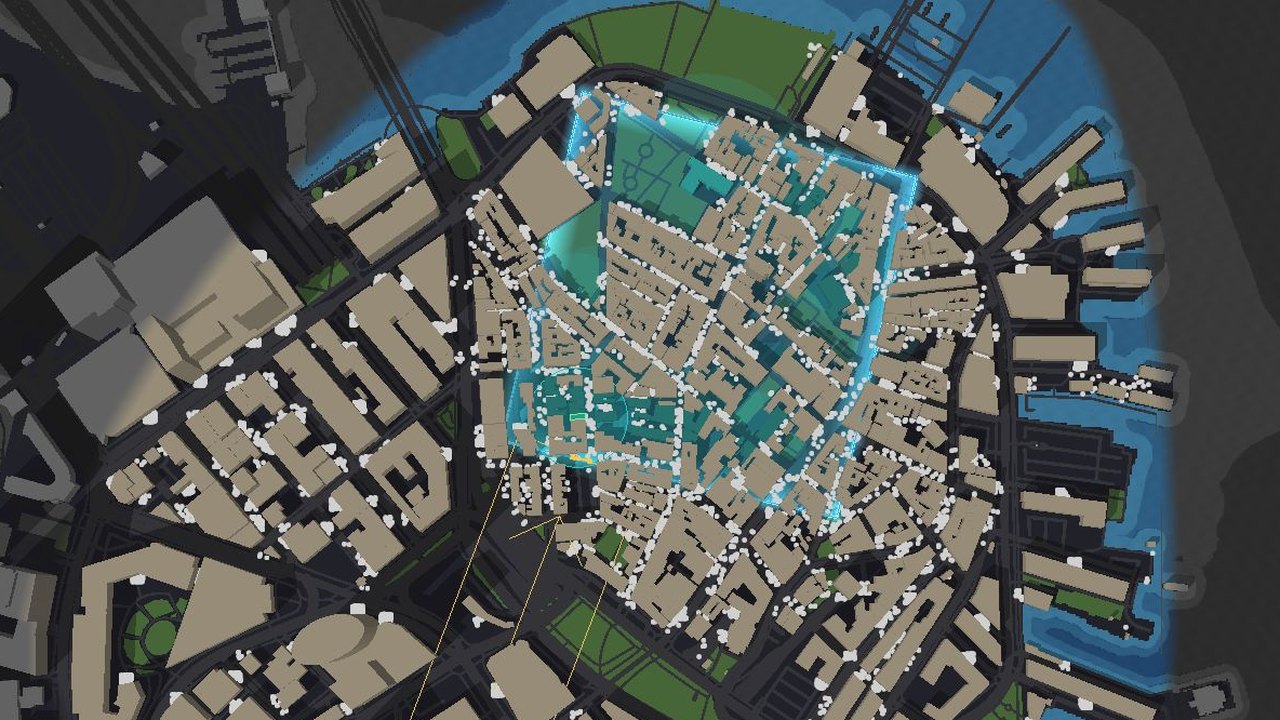
In our Boston opener the gate went in the south wall of a safe zone around the dense residential streets just below the north bridge. The zone held 18% before the outbreak. We lined the approach and the inside streets with 45 garrisons, upgraded a building near the north edge and another just inside the south gate, then aimed an evac corridor up the street to that gate.
The first green clusters we saw were west of the zone and down by the southeast docks. Both the north side and the southeast corner gave way, but our garrisons kept firing inside the infected district and held 8% alive.
Boston level 2: Cover the park from a smaller zone
- Badge
- Silver · 9%
- Civilians saved
- 2,521 / 25,768
- Game time
- 3:06
- Top kills
- Mortar 22,620 · Garrison 1,347
Boston level 2 brings the western bridgehead and the park to the south into play. On our first attempt two zones sheltered 21% at the start. We posted most of the new garrisons along the north edge of the western zone. Zombies reached its southern wall from the park and its eastern wall through the high-rises. We restarted after several breaches while the survival count still showed 19%.
The Boston level 2 debrief marked a break too close for our mortar to hit. On the retry we kept one compact western district with 9% inside. We spent $5,353 on two lines of mortars and $1,380 on garrisons close to the exposed walls. The mortars hit crowds in the park and at the northern junction while the garrisons could reach the streets beside the wall. We cleared Boston level 2 on that second attempt.
Boston level 3: Bring the Library inside the wall
- Badge
- Bronze · 9%
- Civilians saved
- 9,511 / 99,843
- Game time
- 4:42
- Top kills
- Mortar 61,118 · Militia 27,859
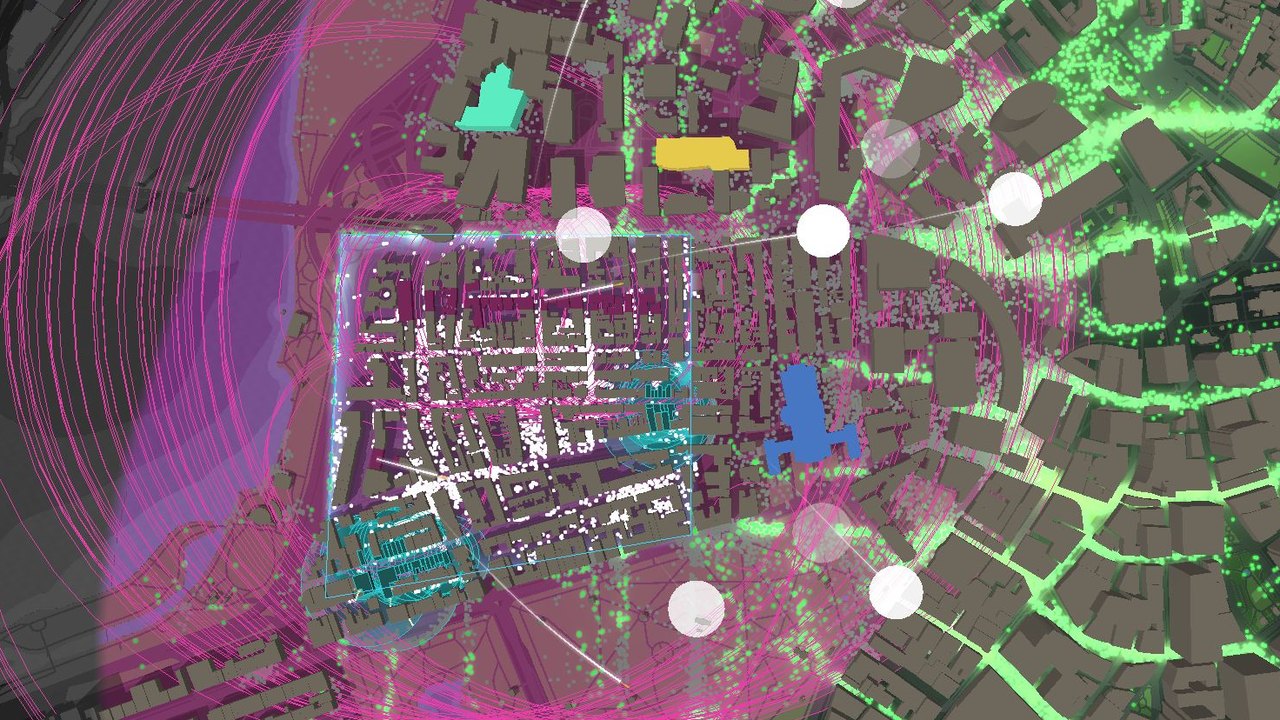
Our Boston level 2 zone held just 2% when the map expanded. We extended southwest into the residential blocks, shared one wall with the old district and assigned Militia to the Library. The new perimeter held 7% before the outbreak. We put mortars on the southwest streets and garrisons along the west and south walls.
When the southeast corner broke, the Library armed nearby civilians, 2,005 of them by the end of Boston level 3. An Airstrike had opened a gap in the western bridge near the old zone, but crowds still had crossings farther west and north. Check those crossings before extending the wall.
Boston level 4: Keep the inner district when the outer walls break
- Badge
- Bronze · 7%
- Civilians saved
- 14,514 / 200,013
- Game time
- 7:45
- Top kills
- Mortar 75,567 · Militia 71,940
The western bridge was intact again when we entered Boston level 4. On our first try the new eastern district included the Government Office, a reinforced wall and a northern gate. Civilians came through that gate, but both outer districts broke and the survival count fell to 3%.
On our retry we spent the wall-upgrade money elsewhere, pushed the northeast corner outward and brought the starting share inside from 5% to 7%. We added nine mortars and changed the Government Office from Police to Militia. Our first helicopter worked the west bridge entrance and our second fought over the breached eastern district. The original small zone held. Look at its west and south walls before continuing to Boston level 5: we found crowds outside both, pressed against intact sections with no gate.
Boston level 5: Give the park crowd a way into the surviving zone
- Badge
- Bronze · 4%
- Civilians saved
- 10,025 / 209,867
- Game time
- 12:29
- Top kills
- Mortar 97,275 · Helicopter 55,307
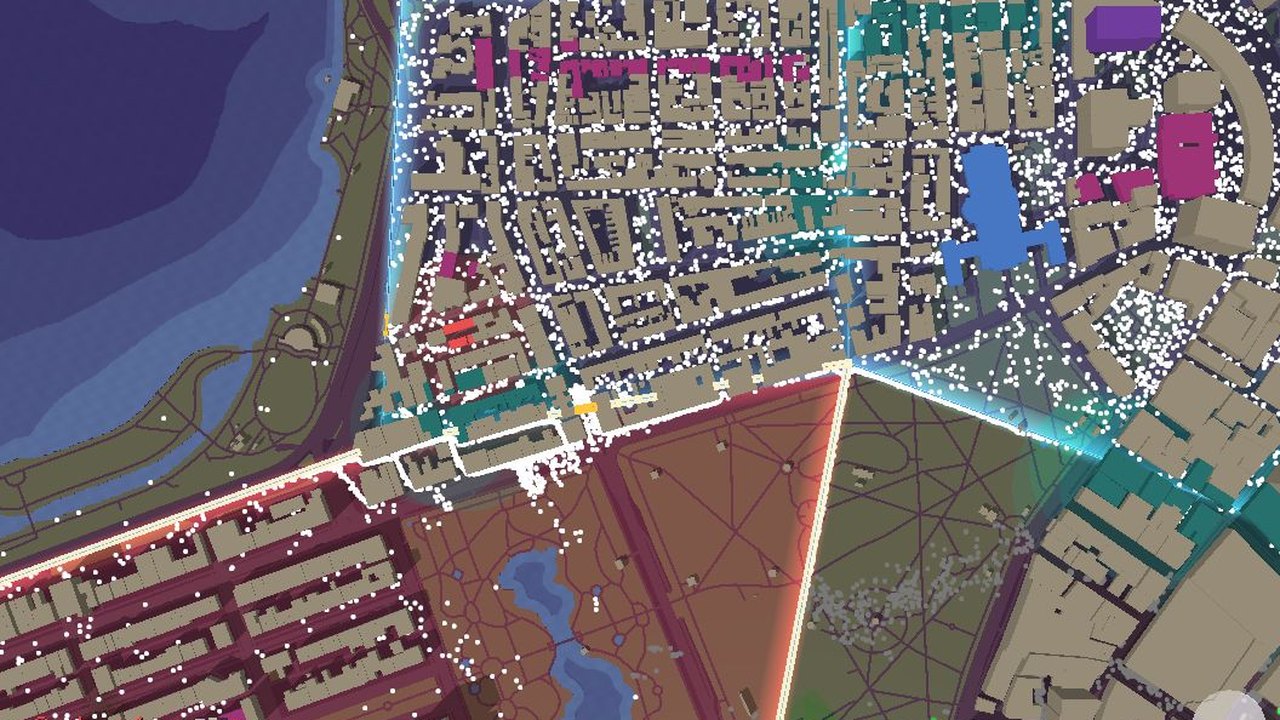
Before starting Boston level 5, we put a gate in the core's west wall and another in the shared wall facing the southwest park. We also added a northern zone with mortars covering the bridge junction. When the southwest district fell, civilians crossed through the shared gate and spread into the surviving streets. That gate worked without a new corridor.
The airport, northern waterways and southwest neighborhoods were all in play. Pink swimmers crossed the open bay toward the docks even as the ordinary horde used the bridges. Mortars led our Boston level 5 tally, while all eight turrets we had placed finished with zero kills: check which streets a new unit can reach before buying more.
What kept Boston's waterfront district alive
Our Boston mortars needed room to fire, but their inner range left streets beside the wall exposed. Shortening the western zone and putting garrisons near the approaches helped on level two. Later, that same compact district stayed intact after neighboring walls broke. The last change it needed was an entrance from the park where the refugees had gathered.
When to use Boston's Extra Safe Zones perk
Extra Safe Zones fills the first perk slot in Boston and lets you place three additional zones within the same land cap. Clearing Boston makes the perk available on other campaign maps.
Boston campaign questions
- Can I tell where a Boston outbreak will start before pressing Ready?
- Not in our Boston level 1 run. The planning view showed the civilian streets and our defenses, and the outbreak clusters appeared only when the battle started. Zoom out then to check both ends of town before committing a battle card.
- Why did my helicopter leave the Boston bridge?
- It ran out of ammo. In our Boston level 4 run the selected helicopter showed Out of Ammo, Leaving after its last reload and flew off the west edge. See the Helicopter card for its cost and arrival time.
- Why can two Boston levels show 9% saved and award different badges?
- The Silver badge threshold rises with the level. Our Boston level 2 result was 2,521 of 25,768, enough for Silver. In Boston level 3 we saved 9,511 of 99,843 for Bronze. Both end screens displayed 9%.
- Which unlock did we get on the Boston level 4 retry?
- Helicopter unlocked when we retried after the wall breach on Boston level 4. Turret unlocked when we cleared the level.
Comments
Site
No comments yet. Ask a question or share what worked in your runs.