
Zombies Aren't Real Wiki › Miami
Zombies Aren't Real Miami guide
On the five Zombies Aren't Real Miami levels, build around a crossing you can defend from both banks. In our Normal run the south-bank mortars carried the opening, and the blocks beside the middle bridge kept sheltering civilians after the outer walls broke. Miami comes with Quick Deploy in Jogamedev's horde-defense strategy game.
Zombies Aren't Real Miami levels and unlocks
Civilians is the population set for each campaign level. The battle can start with a different number. Each saved fraction uses the crowd in that Miami run.
Miami level 1: Face the south-bank gate toward the middle bridge
- Badge
- Diamond · 53%
- Civilians saved
- 2,963 / 5,547
- Game time
- 1:22
- Top kills
- Mortar 1,775 · Turret 1,209
We had already unlocked Mortar and Turret in Boston. If Miami is your first city, you start with Garrison and Paratroopers. Mortar comes first in the card unlock order.
We enclosed the south-bank blocks beside the middle bridge in Miami level 1. That put the Auto Parts Store inside our safe zone, where we could use its Command Post. We set the gate on the north wall and drew a corridor across the bridge to it. The western park had a Hold of its own, but the only way through our wall was from the north.
We bought mortars along the south edge and in the northwest corner, then put turrets on the north and east. The planning screen counted a quarter of the civilians inside. By the clear, more than half the starting crowd had survived. The two types of fixed gun accounted for every kill on the Miami results screen.
Miami level 2: Give the crowd at the west wall an entrance
- Badge
- Silver · 15%
- Civilians saved
- 5,429 / 33,961
- Game time
- 3:00
- Top kills
- Mortar 22,064 · Helicopter 3,438
If you want people waiting in the western park to enter, put their gate on that side. Miami level 2 opens up the towers across the river. We kept the old bridge gate, extended south along a shared wall and set the law office to Broadcast. Two Holds lay just outside the closed western wall. Civilians bunched there while others reached the northern entrance, and when zombies swept through the southwest, the crowd at that Hold scattered.
On our Miami run the new mortars went west and north, with turret rows across the southern blocks. Those guns helped clear the level while civilians were still standing outside the west wall.
Miami level 3: Take the north bank and keep a gate on the west
- Badge
- Silver · 14%
- Civilians saved
- 11,617 / 79,381
- Game time
- 8:24
- Top kills
- Mortar 34,443 · Helicopter 27,797
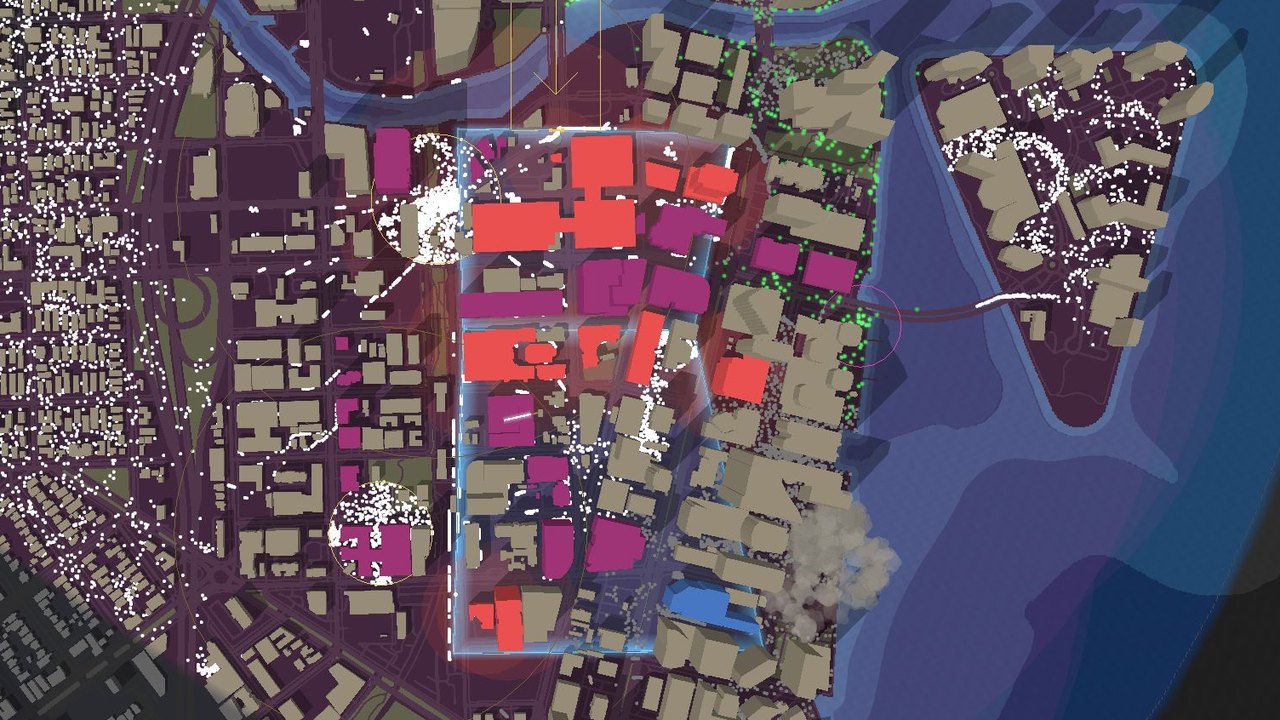
The harbor islands bring a second problem to Miami level 3. The port and southeast island are far from the old mortar positions. We crossed the river with the new boundary and put its western gate at the end of the passage from the older district. This brought the planning estimate up from 4% to 11%.
We used helicopters for the port bridge, western gate and southeast island as the crowds shifted. A Fire Bomb went along the road outside the old west wall. The outer southern district eventually broke. The north bank and the district behind the shared wall lasted through the clear.
Miami level 4: Staff the north district before the west wall breaks
- Badge
- Bronze · 9%
- Civilians saved
- 17,884 / 185,174
- Game time
- 9:55
- Top kills
- Helicopter 72,121 · Mortar 53,193
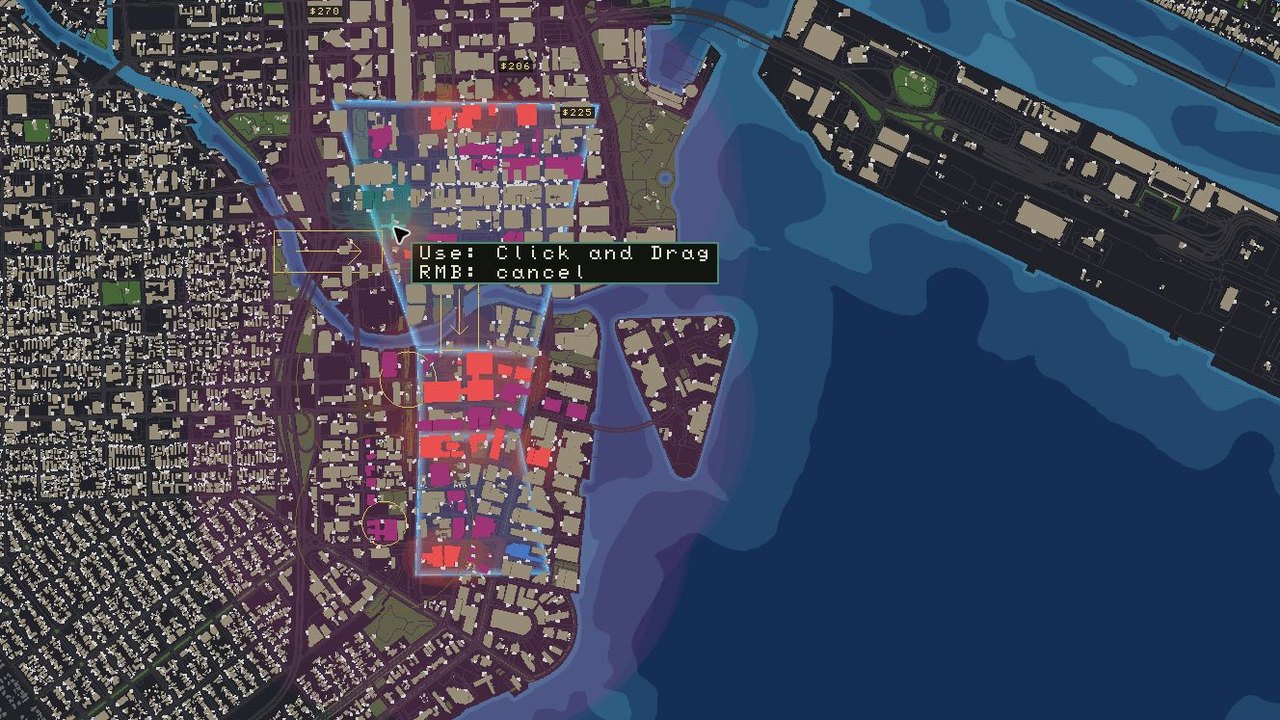
In Miami level 4 the map reaches the outer coast and the chain of islands to the north. We built outward from the old north wall and left Broadcast serving the southern district. The Telecommunications Company inside the new boundary could arm Militia, and the Mexican Restaurant supplied Police on Guard. The Stadium Arena touched the perimeter but its panel still asked for a safe zone.
On our Miami run the northern district broke first at its west wall. Police, militia and garrisons were all firing while civilians remained packed in the middle district. Nine helicopter calls reached fights farther out along the roads. That was the one Miami level in our run where helicopters finished above the mortars.
Miami level 5: Protect the middle blocks as the outer districts fall
- Badge
- Bronze · 7%
- Civilians saved
- 17,055 / 223,953
- Game time
- 19:15
- Top kills
- Mortar 100,916 · Helicopter 60,652
On Miami level 5 we extended the north side once more. We gave the Beauty Salon Repair and set the Professional Service building to Command Post. The new northern blocks fell first, followed by the older northern district and the southern tip. Some guns had exhausted their ammunition while civilians still occupied the middle blocks.
We sent helicopters to the western river bend, the northern wall and the harbor approaches. For Call to Arms we aimed at people already gathered near shared walls. The first order at the middle wall recruited 21 civilians. The second, just inside the west gate, reached 68. The final Miami screen counted those recruits separately from militia armed after a breach.
What held through the Miami campaign
The middle bridge gave our Miami defenses a place to grow north and south while keeping guns near the same approaches. The worst spot for civilians was the park outside the western wall. Broadcast reached it, the Hold filled and the nearest entrance still faced another street. Select the Broadcast building to see its range, then trace the street from the waiting crowd to a gate within reach.
Miami perk: Quick Deploy
Quick Deploy shortens the first wait for each battle ability by 33%. Miami carries it as its home perk. Finishing the last level unlocks it for other campaigns. We had it equipped in Miami before the unlock appeared, so we could already use it when setting up our later helicopter calls.
Miami campaign questions
- Which building gave us Command Post in Miami level 1?
- The Auto Parts Store on the south bank. Inside the zone its Command Post panel showed a 25% fire-rate bonus within 650 m. We kept the mortars and turrets near that bank.
- Why did Stun Gas appear on our Miami results screen?
- Stun Gas is the results-screen name for the Gas Bomb card, which we equipped for Miami level 1. Our mortars and turrets cleared that battle before we used it.
- Did the bridge stay closed after C4 on Miami level 4?
- No. Traffic resumed on the island bridge we tested. The HUD credited the blast with 453 zombie kills, but the green line across the bridge soon filled in again.
Comments
Site
No comments yet. Ask a question or share what worked in your runs.